

For thirty years I cooked in diner kitchens around Toledo, and for most of those years pasta meant a box off the dry goods shelf and a pot of boiling water. Nothing wrong with that when you're feeding two hundred plates a shift. But when my daughter started dropping the grandkids off on Sundays and asking why Grandpa never made "the good noodles" like her friend's Italian grandmother does, I figured it was time to actually learn. I bought a Marcato Atlas pasta machine, the hand crank model made in Italy, because it's the one every serious home cook and half the line cooks I ever worked with swear by. That was two years ago. I've since rolled out more dough than I can count, ruined a few batches learning the hard way, and landed on a process that works every single time.
This guide is that process, laid out step by step, using the Marcato Atlas the way it's meant to be used. If you've got a different hand-crank machine the steps will mostly transfer, but the roller settings and cutter attachment references here are specific to the Atlas 150, since that's what's clamped to my counter every Sunday morning. Give yourself about ninety minutes the first time you try this. Once you've done it a handful of times you can have fresh noodles ready in closer to forty five.
The Marcato Atlas Is the Machine That Actually Gets Used
Plenty of pasta gadgets end up in a drawer after one attempt. The Atlas is different. It's the one machine I've had for two years that still comes out every single Sunday, because it does the one job right and doesn't fight you.
Amazon Check Today's Price on Amazon →Step 1: Mix and Knead a Dough That Won't Fight You
I use a simple ratio that hasn't failed me yet: 100 grams of 00 flour or all-purpose flour per egg, for however many people I'm feeding. For a family of six I'll do 500 grams flour to 5 large eggs, plus a pinch of salt. Mound the flour on a clean counter or in a wide bowl, make a well in the center like a little volcano, and crack the eggs into it. Beat the eggs gently with a fork first, then start pulling flour in from the inner walls of the well a little at a time. Go slow here. If you dump all the flour in at once you'll get a shaggy mess that's hard to bring together.
Once it's too stiff to work with a fork, get your hands in there. Knead the dough for a solid eight to ten minutes. I know that sounds long standing at a counter, but this is the step that decides whether your pasta holds together or falls apart in the pot later. The dough should go from rough and sandy to smooth, elastic, and slightly tacky but not sticky to the touch. Press a thumb into it. If it springs back most of the way, you're done. If it's still stiff and cracking at the edges, keep going and add a few drops of water if it's genuinely too dry.
Use room temperature eggs, not straight from the fridge. Cold eggs make the dough seize up and stay stiff longer, which just means more kneading before it's ready. I set mine out on the counter about twenty minutes before I start. And don't reach for whatever cheap eggs happen to be on sale. A good deep-yellow yolk gives the finished pasta that rich egg-yolk color you see at a real Italian table, not the pale, flat look you get from a thin dozen.
Don't skip weighing your flour if you own a kitchen scale. Scooping flour with a measuring cup can pack in anywhere from 120 to 150 grams per cup depending on how you scoop, and that swing is exactly why so many first-time pasta dough attempts turn out either dry and crumbly or wet and unmanageable. A scale takes the guesswork out of it.
Step 2: Let the Dough Rest
Wrap the dough tightly in plastic wrap, or set it under an upside-down bowl, and let it sit at room temperature for at least thirty minutes. I've pushed this to a full hour with no issues, and you can even rest it in the fridge for a few hours if you're prepping ahead, just bring it back to room temperature before rolling.
This step matters more than people think. The kneading you just did builds up gluten strands that are tight and resistant. If you try to roll the dough through the Marcato Atlas right away, it'll spring back with every pass and fight the rollers the whole time. Give it that rest and the gluten relaxes, the dough goes slack, and rolling it down thin becomes almost effortless. I learned this one the hard way on my second attempt, when I was impatient and skipped the rest entirely. The sheets tore, shrank back after every pass, and I ended up with noodles that cooked up tough.
If the grandkids are already at the door and you're short on the full thirty minutes, don't panic and don't skip the rest entirely either. Even a rushed fifteen minutes wrapped tight makes a real difference over rolling straight from kneading. I'd rather serve dinner ten minutes later than fight a stiff sheet through the rollers the whole time and end up with lopsided noodles.
Step 3: Roll It Down Through the Atlas, Setting by Setting
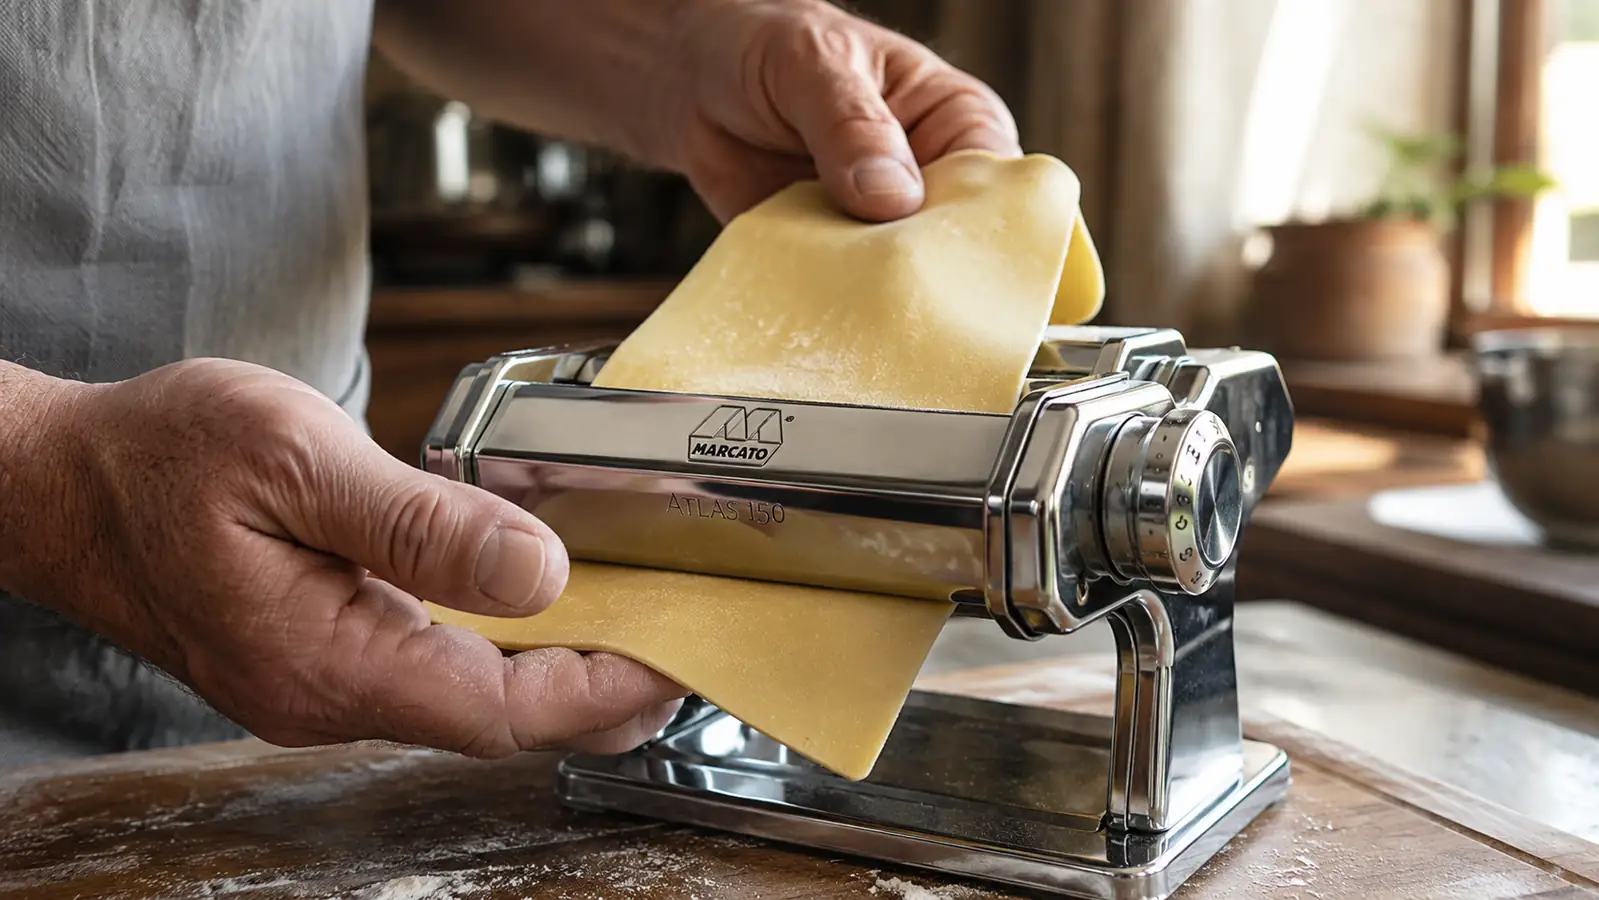
Clamp the Marcato Atlas to the edge of your counter using the built-in clamp. It grips solid and doesn't wobble, which matters once you're cranking with one hand and feeding dough with the other. Cut your rested dough into four or five manageable pieces and keep the ones you're not working on covered so they don't dry out.
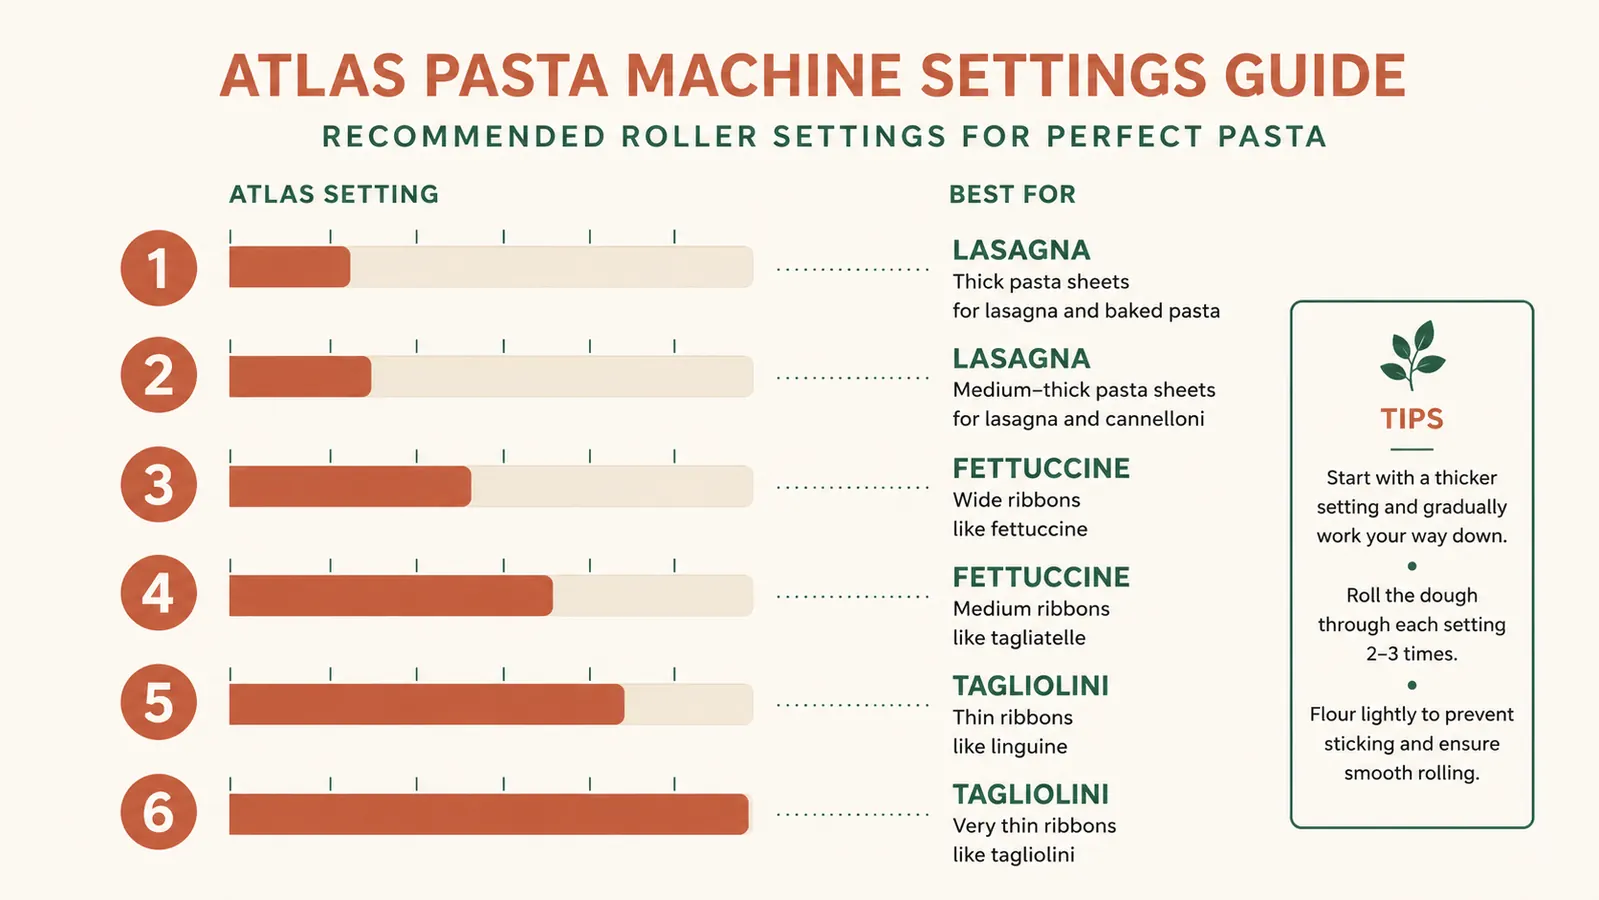
Flatten your first piece by hand into a rough rectangle, thin enough to fit the width of the rollers. Set the Atlas dial to setting 1, the widest gap, and crank the dough through. Fold it into thirds like a letter, turn it ninety degrees, and pass it through setting 1 again. Do this two or three times. This step, folding and re-rolling at the widest setting, is what actually laminates and smooths the dough, and it's the step most first-timers skip because they're eager to get to thinner settings.
Once the dough is smooth and holding its shape without tearing, stop folding and start narrowing the dial, one setting at a time, from 1 to 2, 2 to 3, and so on, passing the sheet through once at each setting. Never skip a setting on the Atlas. Jumping from setting 2 straight to setting 4 puts too much strain on the sheet and it'll tear or thin unevenly. For fettuccine and tagliolini I stop at setting 6 on my Atlas, which gives a sheet thin enough to see light through but still sturdy enough to handle. For lasagna sheets I stop at setting 4 or 5, since you want more body there. Dust the sheet lightly with flour between passes if it starts feeling tacky against your hands.
If a sheet starts sticking to the rollers or tearing along one edge, stop and check two things before you keep cranking. First, is there enough flour dusted on both sides. Second, did you turn the crank steady and slow, or jerk it. The Atlas rollers do the work fine on their own, they don't need muscle behind them. A slow, even crank gives you an even sheet every time. Rushing it is how you end up with a noodle that's thick on one end and paper thin on the other.
Step 4: Cut Your Noodles
The Atlas comes with a cutting attachment built into the same housing, letting you switch between fettuccine and tagliolini widths without swapping tools. Lay your rolled sheet flat, trim it to a manageable length if it's gotten long, and feed it straight into the cutter while turning the crank. It comes out the other side as cut noodles in a matter of seconds.
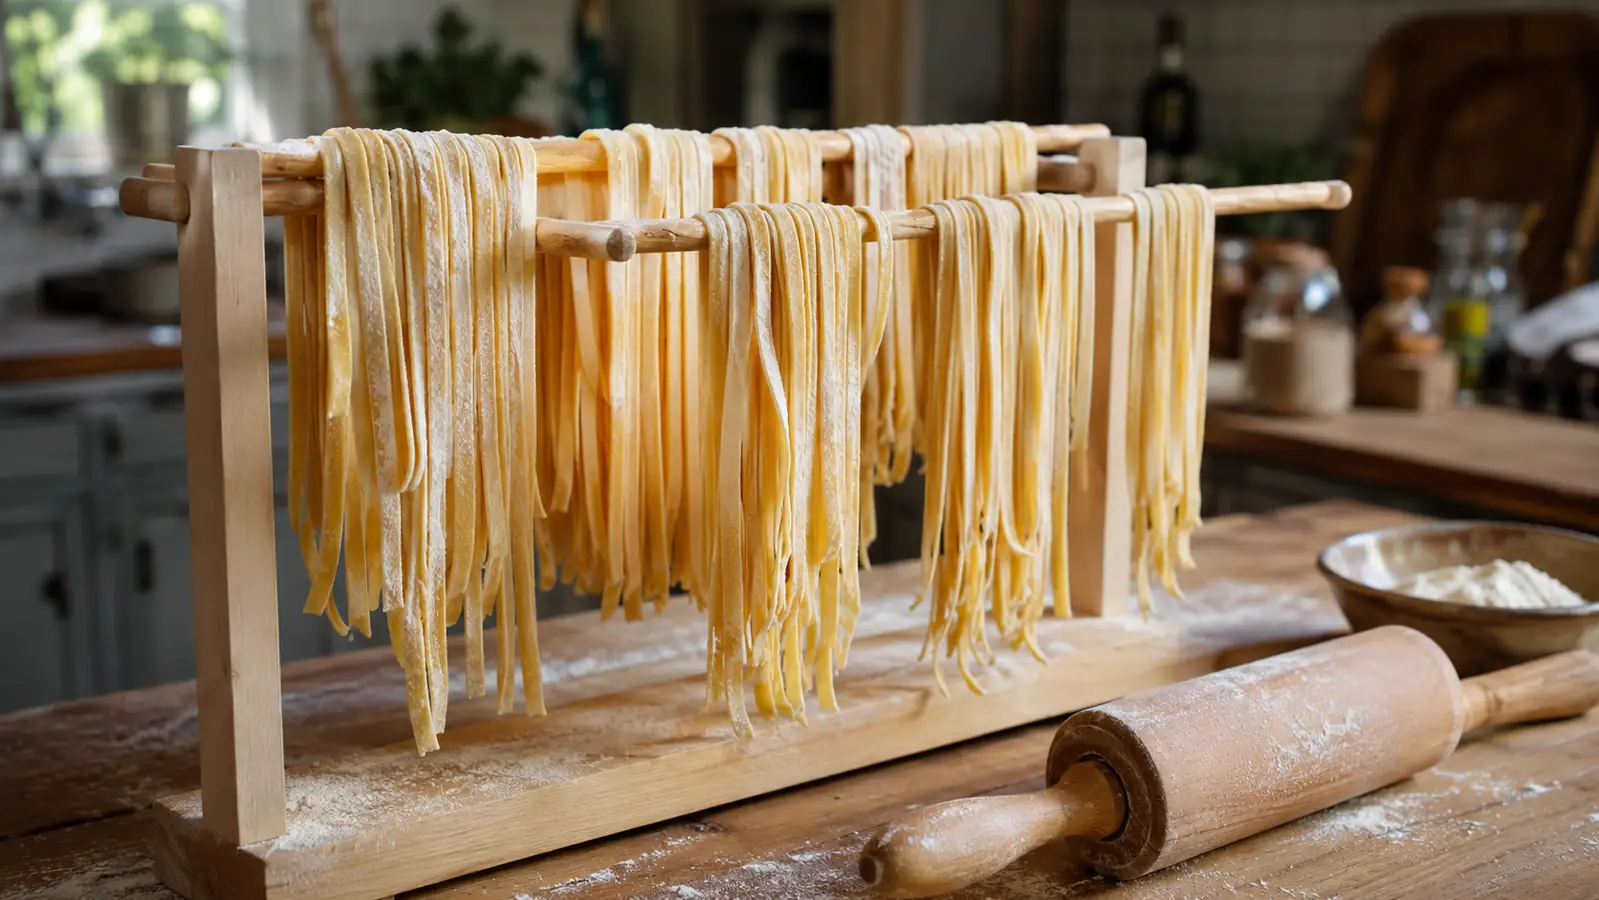
Catch the noodles as they come through and toss them lightly in semolina flour right away. Semolina is coarser than regular flour and does a better job keeping fresh noodles from sticking to themselves or to each other while they sit. Drape the cut noodles over a drying rack, the back of a chair with a clean towel over it, or your forearm in a loose nest if you're cooking within the hour. If you're making a lasagna sheet instead of cut noodles, skip this step and set the flat sheets aside on a floured towel.
Want a shape the built-in cutter doesn't do, like pappardelle or a wide ribbon noodle. Skip the attachment on that pass and cut the rolled sheet by hand with a sharp knife or a pizza wheel, straight down the length. Marcato also sells separate attachments for the Atlas, like an angel hair cutter and a ravioli maker, that clamp onto the same machine if you get serious about it. I added the ravioli attachment last year and it's been worth every dollar for holiday dinners.
Step 5: Cook It Fresh, or Dry and Freeze It for Later
Bring a large pot of well-salted water to a rolling boil, salted enough that it tastes like the sea, same as I'd do for any pasta in a diner kitchen. Fresh pasta cooks fast, ninety seconds to three minutes depending on thickness, so stay near the pot. It's done when it floats and has lost that raw, doughy bite in the center. Reserve a cup of the starchy pasta water before you drain, it's what pulls a sauce together into something that actually clings to the noodle instead of pooling at the bottom of the bowl.
If you're not cooking it same-day, you've got two good options. Let the cut noodles air dry on the rack for a couple of hours until they're leathery and no longer tacky, then box them and store at room temperature for a few days. Or skip the drying and freeze the nests directly on a sheet pan, then bag them once solid. Frozen fresh pasta goes straight into boiling water, no thaw needed, and it holds its texture better than the dried route if you're eating it within a month or two.
Match the sauce to the noodle the way any diner cook would think about it. Thin ribbons like tagliolini want something light, a bit of butter, garlic, and lemon, or a simple aglio e olio, since a heavy sauce will just weigh them down. Wider fettuccine can carry a cream sauce or a bolognese without falling apart under the weight. And fresh lasagna sheets don't need to be boiled first at all, they cook right through in the oven, which saves you a whole step on a busy Sunday.
What Else Helps
A few things I wish someone had told me before my first attempt. Clean the Atlas rollers with the small brush that comes with it, never water, since water on the rollers invites rust on a machine that's meant to last decades. Keep a bag of semolina flour on hand specifically for dusting, it's a two dollar bag that saves you from a sticky, gummy mess every time. If your dough keeps tearing on the narrower settings, it usually means it wasn't rested long enough or it's slightly too dry, and a few drops of water worked in by hand fixes it fast.
Weather matters more than people expect. On a humid summer afternoon in Toledo my dough needs less water and more flour on the counter, or it turns sticky and hard to feed through the Atlas cleanly. In the dead of winter with the furnace running and the air bone dry, I sometimes need an extra egg yolk to keep the dough from cracking. Don't treat the recipe as fixed. Treat it as a starting point and adjust by feel, same as you would with any bread or biscuit dough.
And if you've got grandkids or kids around, hand them the crank while you feed the dough. Mine fight over whose turn it is, and it turns a Sunday chore into the actual point of the afternoon. The first time I did this with my granddaughter she cranked so slow the dough barely moved, and I nearly told her to speed up before I remembered that slow and steady is exactly what makes a good sheet. Sometimes the beginner does it more right than the guy with thirty years in a kitchen.
Dried pasta from a box is fine. Fresh pasta rolled thin enough to see through is a different food entirely, and once you've had it that way it's hard to go back.
Ready to Roll Your Own
Everything in this guide assumes you've got a machine that can actually hold a setting and roll a sheet even. The Marcato Atlas has done that for me for two years straight, no drama, no repairs.
Amazon Check Today's Price on Amazon →